
Why Do Hiking Boot Soles Come Off, and What Can You Do on the Trail?
Even a hiking boot that looks intact can lose its sole on the first demanding walk. Learn how to tell failed adhesive from a crumbling midsole, how to prevent problems, and how to secure a loose sole temporarily so you can reach safety.
A PU midsole can deteriorate even while the boots are in storage.
Inspect the sole edge and midsole, then test the boots on a walk.
Strong repair tape and an adjustable strap.
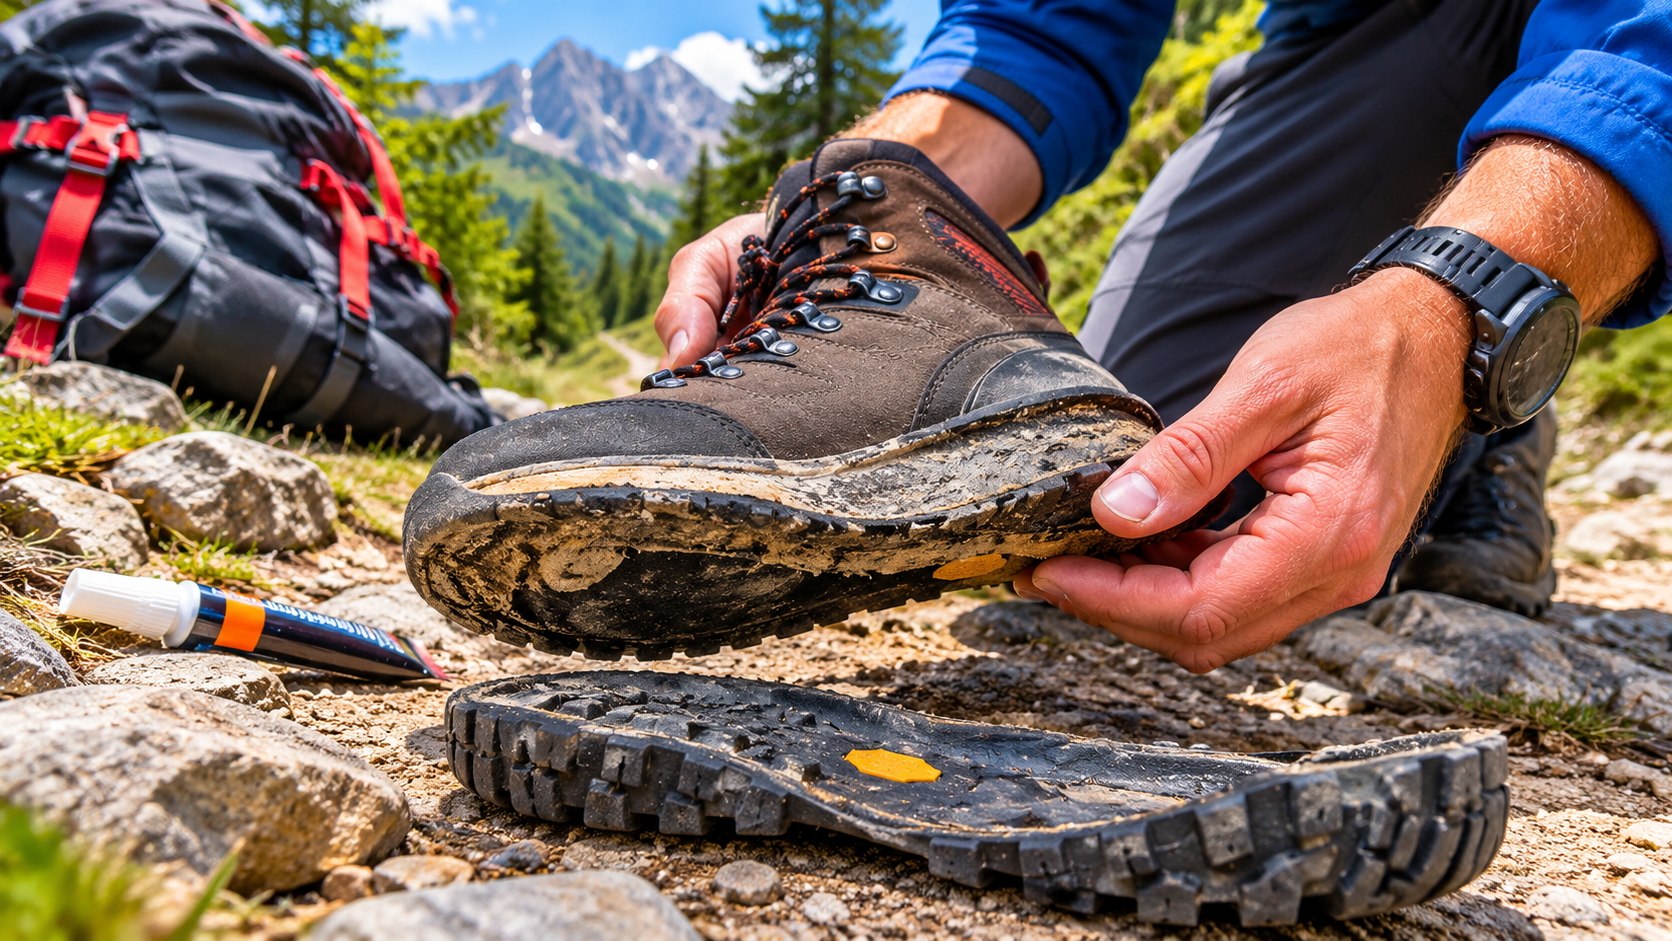
A detached outsole and a crumbling midsole are not the same problem
First identify which layer has failed. That determines whether the sole can be secured at all.
The outsole, or part of its edge, separates in one piece, but the underlying material remains firm and does not crumble. A professional repairer may be able to reglue the boot later.
You see powder, granules, sticky material, or cracked foam between the sole layers. Glue cannot replace a layer that has already broken down.

Quick check: if the separated surfaces are still firm and can be cleaned, you may try securing them temporarily. If the midsole crumbles or breaks apart when pressed, do not expect a lasting field repair.
Why can a sole detach even from a barely worn boot?
‘I hardly wore them’ does not mean the sole is still in good condition.
Some polyurethane (PU) midsoles undergo hydrolysis: the material loses strength even during storage. The deterioration may only become obvious when you start walking.
Drying boots on a radiator, beside a fire, or in excessive heat can damage bonded layers and certain sole materials.
The bond can weaken through use, moisture, and time. A clean separation starting at the toe or heel is a typical sign.
Sharp rocks, repeated flexing, a damaged sole edge, or a snagged outsole can widen a gap that was already forming.
Boots kept in a cupboard for years may have a deteriorated midsole even when the uppers look almost new. A test walk tells you more than their clean appearance.
A five-minute check that may reveal a failing sole
This matters especially with older boots, infrequently worn pairs, or footwear kept in storage for a long time.
- Inspect the entire sole edge. Look for gaps around the toe, heel, and inner side in particular.
- Press the sidewall of the midsole. Material that is hardened, cracked, sticky, or crumbling into granules is a warning sign.
- Flex the boot as it would bend while walking. Do not force it. Check whether a gap opens between the upper and the sole.
- Test it under load. Walk for 20–30 minutes locally, including stairs and a small incline. Do not make a mountain hike the first test of a questionable pair.
Check both boots: if one boot in a pair starts coming apart, the condition of the other is also uncertain.
Storage and care: what helps and what does not?
You cannot stop aging, but you can reduce damage caused by moisture and heat.
Remove mud, take out the insoles, and let the boots dry in a ventilated place at room temperature.
Choose a dry, well-ventilated place with moderate temperatures. Avoid damp bags and hot attics.
After a long break, inspect the entire sole and take a test walk. Regular use is not a guarantee against hydrolysis either.
Have even a few millimetres of opening checked before the hike: each step may pull more of the sole away.
What is actually worth carrying in your backpack?
A small kit that can also help with other gear failures.
| Item | Specific use | Limitation |
|---|---|---|
| 1–2 m of strong fabric-reinforced repair tape | Wrap it around a card beforehand; use it to hold a lifting toe section in place. | Less effective on mud or wet surfaces; tape crossing the tread can make the boot slippery. |
| 1–2 adjustable straps, 20–25 mm wide | Hold the sole layers together mechanically if there is still a sound, stable layer to secure. | Do not constrict the foot; a strap running under the sole reduces grip. |
| 2–3 m of spare cord or replacement shoelace | A backup for securing the sole or holding small components together. | Thin cord may cut into the material or slip; its usefulness is limited. |
| Small scissors or a multitool with scissors | Trim tape and straps safely to the required length. | Avoid damaging the boot, your skin, or the laces while cutting. |
Flexible shoe-repair adhesives generally need clean, dry surfaces and several hours to cure. If you need to move immediately, mechanical fastening may be more practical.
Three situations, three different trail-side fixes
These are emergency measures intended only to help you reach the nearest safe exit.
- Only the toe is peeling away: wipe away loose mud and position the outsole correctly. Wrap short lengths of tape around the toe and upper. If any tape crosses the tread, assume the grip is unreliable.
- The heel or a larger section of the sole has separated: if the layers remain firm, a wide adjustable strap may hold them together. Make sure it cannot slip off the heel, slide around the foot, or create pressure points; account for the strap under the sole whenever you step.
- The whole sole is hanging loose or the midsole is crumbling: there is no reliable quick fix. The boot may no longer be suitable for walking out; look for another way to reach safety or call for assistance.
Test a few steps: after fastening the sole, take 10–15 steps on level ground. If the sole shifts sideways, the toe catches, or your foot hurts, do not push on. Repair materials cannot replace an intact outsole.
Tape, straps, or cord passing beneath the outsole can significantly reduce traction. On wet rock, steep descents, or ice, even a fastening that looks secure does not make the boot safe.
When can you walk out, and when should you stop?
Choose your exit based on the terrain, available daylight, and the actual stability of the boot.
| Terrain / situation | Decision |
|---|---|
| Short, dry, easy forest path | A cautious return may be possible if the boot does not catch on the ground or twist around your foot. |
| Wet roots, mud, rocky slopes | The grip of a temporarily fastened sole is unpredictable; find a gentler, safer exit route. |
| Long ridge, exposed trail, snow or ice | Do not attempt it with a temporarily fastened sole. If you cannot turn back safely, ask for help. |
| Injury, inability to walk, or immediate danger | Call 112 and provide your exact location, the terrain conditions, and the injured person’s condition. |
You can also give rescuers GPS coordinates, a trail junction shown on your map, or a marked trail identifier. If hiking with others, decide together when to stop and which exit route to take.
Reglue, resole, or replace?
The condition of the damaged layer determines whether a durable repair is technically and economically worthwhile.
A cobbler or the manufacturer’s repair service can assess whether regluing is possible; proper surface preparation and curing time are essential.
Adding glue usually cannot save it. A complete, compatible sole-unit replacement may be an option if the boot’s construction and the repair service allow it.
Photograph the damage and sole layers, keep your receipt, and contact the retailer or manufacturer.
For demanding terrain, use only footwear with a verified reliable repair, or replace the boots.

Three things worth remembering
Test-walk older boots
A PU midsole can deteriorate even when the boots have barely been worn. Inspect the sole edge and midsole carefully.
Tape + adjustable strap
They may temporarily hold an intact but separating sole layer together, but can also reduce traction.
Getting out safely is the priority
If the midsole is crumbling and the boot is unstable, do not try to finish the hike.

Professional references and image credits
Technical references: Information on midsole aging, manufacturers’ care recommendations, and adhesive curing times is based on the linked sources. Trail-side fastening with straps or tape is an emergency measure, not a manufacturer-approved repair.
- LOWA — hydrolysis, material aging, and sole separation
- PRABOS — PU soles, inspection, and repair limits
- GEAR AID — how to reglue a shoe sole properly
- GEAR AID EU — Aquaseal SR use and 8–12-hour curing time
- Eclectic Products — Shoe Goo and its 24–72-hour full cure
Image sources: the article links to the following external images; no image data is embedded in its HTML.
- Hero photo – John Baker / Pexels
- Hiking shoe with detached sole – Quiriana38 / Wikimedia Commons, CC BY-SA 4.0
- Cobbler at work – Bella Zhong / Pexels
- Fekete Valley – Túraprogramok
- Lillafüred – Túraprogramok
- Kékestető area – Wikimedia Commons; see the file page for licensing
The photos accompanying the Túraprogramok recommendations show their wider regions and may not depict the exact hiking routes.