Via Ferrata for Beginners – What to Know Before Your First Route
The via ferrata is a spectacular bridge between hiking and rock climbing: steel cables, metal rungs and rocky ledges take you to places few walking trails can reach. But your first outing is about more than courage. We explain what equipment you need, how to interpret difficulty grades and how to recognise a suitable first route — with realistic scenarios and common beginner mistakes, without unnecessary jargon.
Even with a fixed cable, you may face exposure, falls and serious injuries.
A helmet, climbing harness and suitable energy-absorbing via ferrata lanyard.
Look for a short, clear A or A/B route, preferably with a qualified instructor.
A steep or lengthy walk down may still await you after the ferrata.
- A via ferrata is not an ordinary hike The cable helps secure you, but you must move and climb for yourself.
- Three essentials Helmet, harness and a proper Y-shaped, energy-absorbing via ferrata lanyard.
- Choose an easy first route As a beginner, start with a short A or A/B route and a qualified guide.
- Learn how to transfer your carabiners You cannot safely learn the belay system by guessing.
What happens on a via ferrata?
A protected route does not eliminate exposure
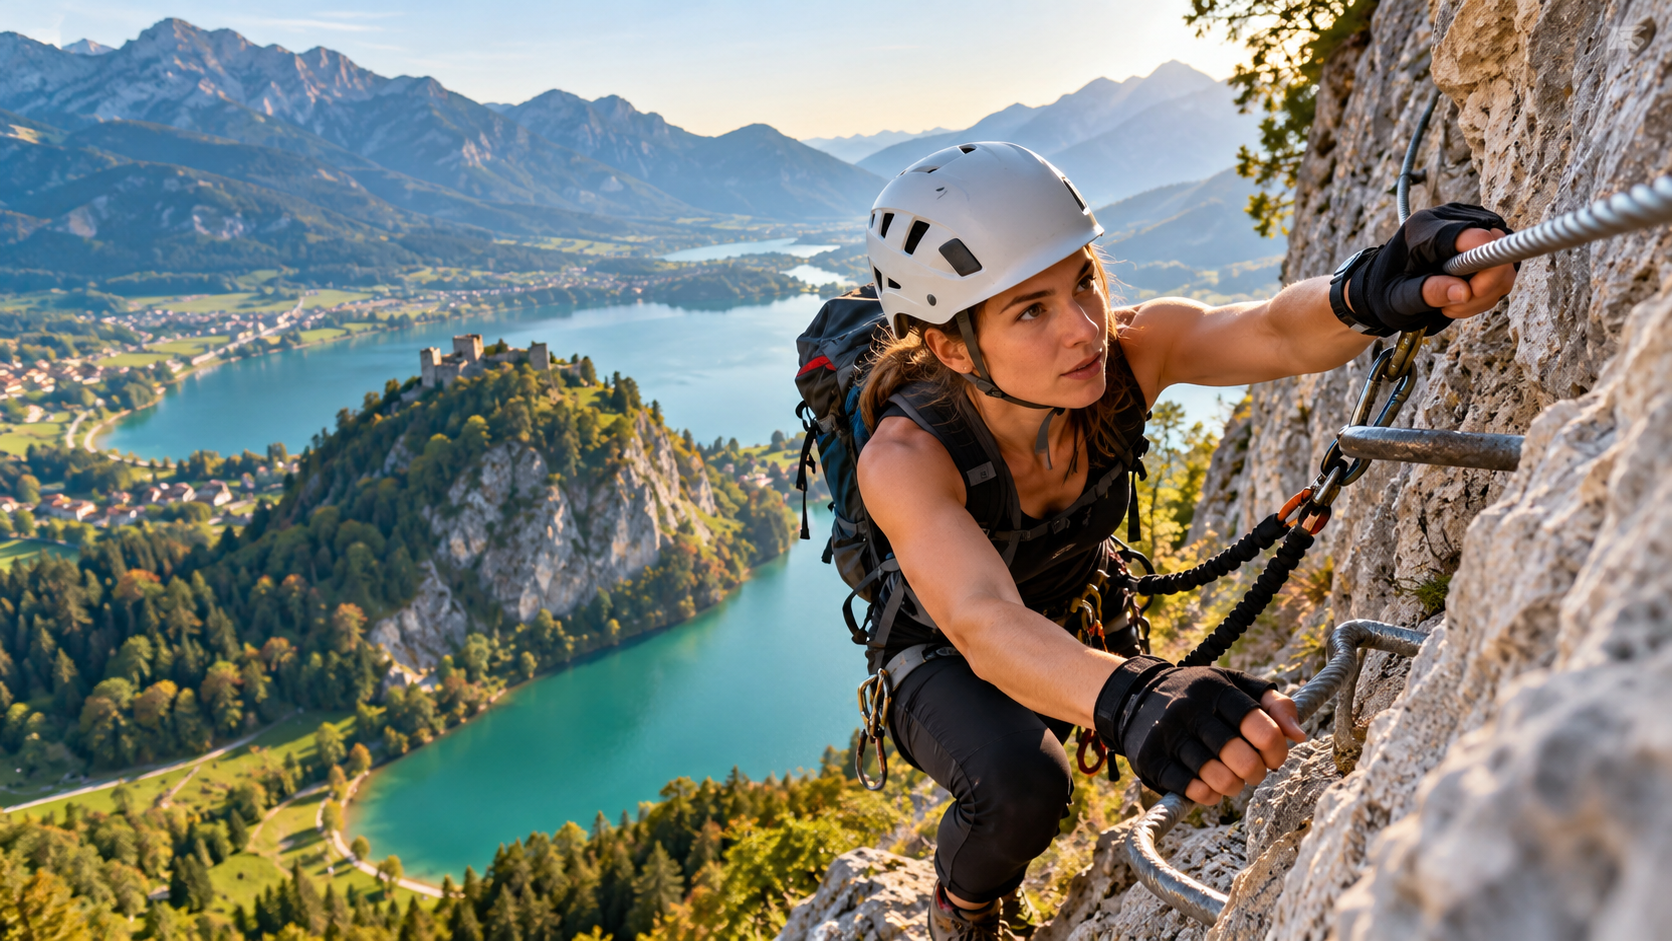
The steel cable is for protection; rungs and handholds help you progress.A via ferrata (known in German as Klettersteig) is not simply a hiking trail with a handrail added. A steel cable anchored to the rock provides a means of protection, while metal rungs, ladders and natural holds help you advance. However, you still need to step, balance and handle your equipment deliberately throughout. The installed aids reduce certain risks, but do not remove the height, uneven rock or consequences of a fall.
One of the first surprises is that even an “easy” ferrata can be extremely scenic and exposed. A simple iron staircase may already have a drop of dozens of metres beside it, although the climbing itself is technically easy. Conversely, a short, less scenic but steep section may require considerably more arm strength and better coordination.
Picture two routes: one climbs a short vertical ladder to a broad ledge; the other rises gently almost throughout but traverses a narrow shelf above a drop. They might carry the same easy grade yet feel completely different to someone uncomfortable with heights. This is why asking only “What grade is it?” is not enough before your first ferrata.
Unlike traditional roped rock climbing, via ferrata participants usually progress independently along the fixed safety cable. A via ferrata lanyard is not the same as a top-rope belay: in a slip or fall, you may hit the rock or metal fixtures. For your first outing, learn the techniques with a qualified instructor or appropriately certified mountain guide.

A helmet, harness and via ferrata lanyard are essential
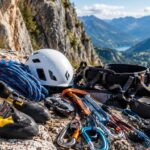
The three indispensable items
Together, these allow you to attach correctly to the installed safety system.The essential kit is a short list: a suitable climbing helmet, climbing harness and an energy-absorbing, twin-arm via ferrata lanyard. However, each item must fit correctly, be in good condition and be suitable for the user. Even expensive gear is of no benefit if adjusted incorrectly or used without understanding how it works.
The energy absorber’s purpose is not to prevent a fall but to reduce the forces generated by a fall within the system’s specified operating conditions. A knotted rope, two ordinary carabiners or a static sling are not safe substitutes. Read the manufacturer’s instructions for use, inspection and retirement criteria.
The application range of systems meeting EN 958:2024 covers users weighing at least 40 kg without equipment and at most 120 kg including equipment . This does not mean every individual product is suitable in every situation: the specific manufacturer’s instructions always take precedence. For children, very light climbers or anyone outside the specified range, a qualified professional must plan any additional rope protection; simply adding a sling is not a safe solution.
If you rent equipment: ask the rental provider or instructor to check the buckles, carabiner gates, webbing wear and energy-absorber pouch with you. Do not use outdated, damaged or previously heavily fall-loaded equipment. Your helmet should allow comfortable movement without sliding off your head, and the harness must not shift dangerously under load.
For your first one or two guided sessions, renting quality gear often makes sense. You can discover which harness feels comfortable and which carabiners are easy for you to operate before choosing your own kit. Rented equipment still has to be used correctly.
The letter grade describes technical difficulty, not the entire route
A–F: how should you read the grades?
On the scale commonly used in Austria, the step from B to C already makes a noticeable difference.Many route descriptions in Austria and neighbouring countries use the A–F difficulty scale primarily to describe the technical challenge of climbing movements and the steepness of the wall. You may also see intermediate grades such as A/B and B/C. Not every country uses this system; K1–K6 and Italian grading schemes also exist. Always read the grading explanation for the route in question.
| Grade | Typical terrain | For beginners |
|---|---|---|
| A | Easy protected path with few steep sections | May be suitable for first practice with an instructor |
| A/B–B | Handholds, iron rungs and occasional steeper steps | Only after assessing that route and its exposure |
| B/C–C | More sustained steepness, arm loading and exposure | Generally unsuitable for a first attempt |
| D–E | Demanding climbing, sometimes vertical or overhanging | Requires sound technique and substantial ferrata experience |
| F | Exceptionally difficult, highly athletic sections | Not for beginners |
The key distinction is that a technical grade does not tell the entire story. A 40-minute, easily accessible B route may be a better first experience than a multi-hour A/B mountain circuit with a difficult descent and no escape options. Yet a short route is not automatically safe either: even a brief section may be frighteningly exposed for a beginner.
Read route descriptions intelligently: look for the route’s topo— a diagram showing its sections and their grades. If the first ten minutes are easy but a mandatory C-grade overhang awaits at the end, it is not an A/B beginner route just because most of it is easy. The hardest unavoidable section, total length, exposure and descent must be considered together.
Check the official description and current on-site information. Choose a route whose hardest unavoidable section lies below your current ability, and tackle your first route with a qualified guide.
Learn to transfer carabiners before entering the route
What does the via ferrata lanyard do on the safety cable?
You must transfer the carabiners at the cable’s fixed anchor points.Both carabiners of the via ferrata lanyard attach to the fixed safety cable. Anchors that fasten the cable to the rock prevent carabiners from sliding freely past them, so at each anchor you must transfer the carabiners one at a time. Keep the second carabiner attached until the first is securely clipped onto the correct next cable section, then move the second. This principle is no substitute for hands-on training or the manufacturer’s exact instructions.
Beginners often underestimate the difficulty of transferring carabiners. On level ground, the action seems simple, but on a rock face you must stand steadily, maintain your position, check that the gates close properly and remain aware of the climber ahead. For this reason, practise the sequence before entering the route, in a safe training area with an instructor until it becomes familiar.
Why must you never unclip “just for a moment”? Because a fall can happen at the very instant a misplaced step makes you lose balance. Even a second without attachment may leave you completely unprotected. For the same reason, never climb onward holding the carabiner in your hand while planning to clip it back on at the next anchor.
A via ferrata lanyard is not equipment for practising falls. In a high fall-factor fall, the carabiner may slide down to the next anchor and the energy absorber may deploy. During this process, the climber can strike the rock or protruding metalwork. If an absorber deploys, further usability must be assessed according to the manufacturer’s instructions and expert inspection; the system will normally need to be retired.

Some lanyards include a dedicated rest attachment point. Its correct use depends on the model: follow the manufacturer’s instructions and your instructor’s guidance. Do not unnecessarily detach either main carabiner from the safety cable.
Calm footwork is more valuable than brute strength
Four simple principles for steady movement
Do not try to haul yourself upwards with your arms on every step.A common beginner mistake is attempting to cover every metre by pulling with your arms. On many ferrata sections, the legs carry your weight while the hands mainly assist balance and direction. If your arms tire within minutes, stop somewhere safe and consider whether you are gripping too tightly or reaching too high.
A good step is not necessarily a large one. Pick an iron rung or natural foothold within comfortable reach, place your shoe carefully and only then transfer your weight. Look first, step second: planning your next two or three movements is more useful than hurriedly searching for holds on the wall.
What if someone catches up with you? A narrow equipped section is not a place for improvised overtaking. Agree on safe passing places; step aside only where you can stand securely. Someone urging you on from behind is not a good reason to climb faster or with poor technique.
A helmet is essential when stones may fall, but it cannot eliminate every danger. Avoid dislodging loose rocks or placing objects near the edge of a ledge, and remember that people may be below you. On a narrow traverse, balance, good cable management and deliberate foot placement can be more important than pulling strength. On vertical ground, avoid hanging rigidly on your arms for extended periods.
Early signs of fatigue include imprecise foot placement, hurried changes of handhold, trembling forearms or repeatedly forgetting to check a carabiner. These are not problems to shrug off before a harder section. If a safe exit is available, discuss retreating with your guide.
Rest before your arms and concentration give out. Practise safe resting techniques and the use of any dedicated rest attachment with an instructor.
Choose a short, easy route that can be planned in advance
Characteristics of a suitable first ferrata
The aim of your first outing is to develop safe habits.Your first ferrata need not be the most famous rock face; choose a route where you are likely to have enough mental capacity left to learn throughout. It should be short, with a clearly identifiable entry, low unavoidable technical difficulty and an understandable descent. The goal is not to struggle through a major challenge, but to finish knowing what you can realistically attempt next time.
A useful question when selecting a route: “If the exposure feels too much at the start, what other activity can we do?” If the only answer is “We have to finish now,” choose a different first route. Being able to turn back easily is worth more than a spectacular photo spot.
It is worth separating climbing time from total outing time. Illustrative planning example: 40 minutes to approach + 60 minutes on the ferrata + 70 minutes descending + 30 minutes for rests and contingency = 3 hours 20 minutes. These are not figures for a particular route; they show why an “hour-long ferrata” may actually require a much longer outing.
If you are considering Austria for your first destination, the Hohe Wand area has classic easier protected routes such as Wagnersteig, Völlerinsteig and Hanselsteig. None is automatically suitable for every beginner: check individual sections, current grade, exposure, descent and any access or conservation restrictions before choosing. A qualified local guide can help select appropriate terrain.

Social media videos usually show the most dramatic few seconds. They may omit almost everything that determines suitability: approach, mandatory crux, exit and return. Check a detailed route description instead.
A via ferrata is a complete mountain outing, not just a climb
Four things not to leave until the last minute
A few minutes of planning can help prevent serious mistakes.Review your ferrata plan at three stages: a few days before departure to check the route and equipment, the evening before to check the local forecast and closures, and at the route entrance to assess actual conditions. An earlier plan is never a reason to enter a route in worsening weather or with damaged fixed protection.
| What do you see? | Why does it matter? | Reasonable decision |
|---|---|---|
| Thunderstorm risk | Exposed rock and metal cables can become life-threatening in a storm | Do not enter the route; choose another activity |
| Wet or icy rock | Shoes and iron rungs offer less grip | Assess conditions carefully; beginners should generally postpone |
| Damaged cable or anchor | The installed protection may no longer be safe to use | Do not use that section; report the damage to the operator |
| An anxious group member | Stress and rushing increase the chance of mistakes | Adapt the plan to the group or change it |
Pack suitable clothing layers, enough water, easy-to-eat food, a charged phone, an offline map, a first-aid kit and, when necessary, a headtorch. The backpack’s size is not what matters: pack it so it will not snag on your equipment or restrict your movement.
If an accident, injury or serious blockage occurs, do not improvise an untrained rescue or rope lowering. The European emergency number 112 is a useful starting point; explain your location, the ferrata’s name, the number of injured people and whether rescue teams have safe access nearby. Mountain rescue teams may ask for additional details, so coordinates on an offline map can be helpful.
For EN 958:2024, the lower limit is 40 kg without equipment, whereas the upper limit is 120 kg including equipment. If you fall outside the specified range, or are unsure whether the product is appropriate, a qualified professional must decide on any supplementary protection.
Learn the technique before trying spectacular walls
A simple plan for your first ferrata day
A good first outing is not about how steep a wall you climbed.A well-structured first ferrata day has a rhythm. It does not begin with hastily putting on a harness in the car park and racing to the wall. Start with instruction, partner checks and practice . The goal is not to discover a lanyard function for the first time halfway up an exposed section.
Three questions to ask yourself at the entrance: Can I confidently operate every buckle? Can I stand and move comfortably in my equipment? Do I know whom to ask if I become unsure on the next section? If the answer to any question is no, resolve it before leaving the ground.
On your first ferrata, “This move is too hard” and “This exposure frightens me” are different issues. You may have enough strength to climb but freeze because of the height. Pressure from companions is not a solution. Your instructor can help judge whether you can continue safely or should remain on easier ground.
Common beginner mistakes: choosing an overly long route; wearing a harness that is too tight or poorly adjusted; rushing carabiner transfers; pulling with the arms for every movement; ignoring a decision point before a difficult section; underestimating weather; and assuming a fall is acceptable because the lanyard will stop you. Avoiding these mistakes is more important than any summit photo.
At the end of the day, do not judge the outing only by the grade you completed. Consider whether you transferred your carabiners calmly, had energy left for the descent and understood your own limits. If so, you can build your ferrata experience deliberately and gradually on future outings.
Moving up to a harder grade is not necessarily the right step on your second outing. Improving your confidence and technique on easy ground is often worth more than attempting a longer or more exposed wall too soon.
Via ferrata for beginners: the foundations of a safe first experience
Assess the whole outing, not just the grade
When choosing your first via ferrata, look beyond the A or A/B label. Exposure, total duration, approach and descent paths, weather, group pace and possible retreat options together determine how suitable a route really is for you.
“If there is a safety cable, a fall cannot be dangerous.”
The lanyard’s energy absorber may reduce forces in a serious fall, but it does not guarantee an injury-free stop. It cannot prevent collisions with rock, iron rungs or other climbers. The aim is always to avoid falling in the first place.
Instruction → proper equipment → easy route → gradual experience
Start with a short, well-documented, low-grade route led by a qualified professional. Learn to operate the lanyard at a safe practice site, then reflect on how steady your movement felt and whether you had enough energy in reserve.

Sources and background
This article is an educational guide. Via ferrata is a potentially dangerous outdoor activity; learn to use the equipment from a qualified professional before your first attempt. Check the current condition of routes in the Hohe Wand area and the details shown on the route cards before setting out. Some photos show different routes, as noted in their captions.
- Trentino mountain rescue and guides – via ferrata fundamentals
- Garda Trentino – 11 practical safety tips
- German Alpine Club (DAV) – 10 via ferrata safety recommendations
- UIAA – Via ferrata basics and grading systems
- British Mountaineering Council – via ferrata gear and safety
- Petzl – limits of energy-absorbing lanyards and supplementary belaying
- Hungarian Standards Institution – details of EN 958:2024
- Túraprogramok – Hanselsteig route details
- Túraprogramok – Völlerinsteig route details
- Túraprogramok – Wagnersteig route details
- Wikimedia Commons – H. Raab: Drachenwand via ferrata (cover photo), CC BY-SA 4.0
- Wikimedia Commons – H. Raab: Falkert via ferrata, CC BY-SA 4.0
- Wikimedia Commons – Stefan Kasberger: close-up of a via ferrata carabiner, CC BY-SA 4.0
- Wikimedia Commons – Globetrotter19: Felsőtárkány via ferrata, CC BY-SA 4.0
- Wikimedia Commons – C. Stadler/Bwag: Hanselsteig, CC BY-SA 4.0
- Creative Commons BY-SA 4.0 licence